
John DiPonziano, DDS, MAGDm DICOI
The success that modern dental implants enjoy today is unquestionably linked to our ability to grow bone.
Prior to 1990 – before the age of barrier membranes – bone grafting was limited to ridge expansion, sinus augmentation, and unpredictable bone filler techniques.
That all changed with the introduction of Gortex membranes in late 1989. These non-resorbable PTFE membranes, first used to regenerate periodontal attachment, (Guided Tissue Regeneration or GTR), soon saw use for Guided Bone Regeneration (GBR).
Barrier membranes, whether resorbable or non-resorbable, function by physically preventing the faster soft tissues from filling the defect before the slower bone cells.
Although Gortex has given way to other more easily manipulated PTFE products, one material that has been used for many years for GBR is titanium mesh.
This rigid metallic “membrane” – which is more accurately described as a type of screen – has the ability to not only create space for bone growth, but also resist collapse under the tissue. This maintains the space, allowing a substantial volume of bone formation to occur under the mesh.
There have been various designs of titanium mesh. But the one criterion that must be present, to insure predictable bone growth, is the lack of movement of the mesh during the bone regeneration period. This is typically accomplished by placing multiple screws or tacks through the mesh and into the underlying bone.
One type of mesh that can be used for smaller, localized defects is placed at the same appointment as the implant fixture. This mesh is held securely by the insertion of a screw through the top part of the mesh that tightens into the threads inside the implant.
The indication for this type of mesh is when the bony defect is limited to an area immediately surrounding the implant, and the implant has sufficient initial stability to be immobile in the bone at time of insertion.
This procedure is less technique sensitive than placement of conventional mesh, since the immobilization of the mesh is ensured by the stability of the implant.
If the prosthetic phase of treatment is started within 4 months, the mesh can be left in place until then. Or, it can be removed after a period of time has elapsed for the formation of bone – typically at least 2 months.
The OssBuilder/SmartBuilder mesh comes in three types of pre-formed configurations based on the anatomy of the defect, (Fig. 1).
Once the proper Type is determined, it can be trimmed and shaped, if needed, to cover the defect completely allowing at least 2 mm of the mesh to extend beyond the defect and onto sound bone, (Figs. 2 through 6).
The advantage of this grafting technique – the ability to predictably grow bone simultaneously with implant integration – reduces the overall treatment time and cost by eliminating the need for a separate implant placement surgery.
The net effect is greater patient comfort and increased patient acceptance of implant treatment.
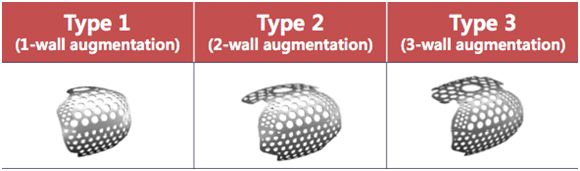
Fig 1: Three types of SMARTbuilder design

Fig 2: Assess the defect after fixture placement and choose the appropriate type of SMARTbuilder.
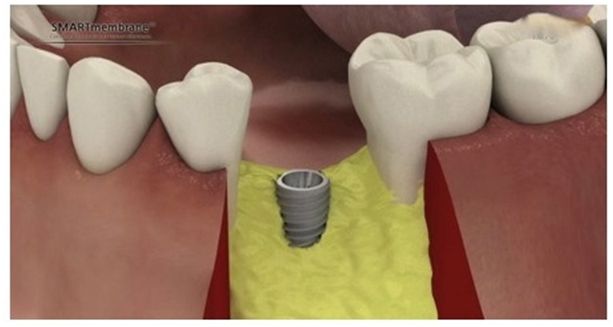
Fig 3: Screw in the special post used to hold the mesh
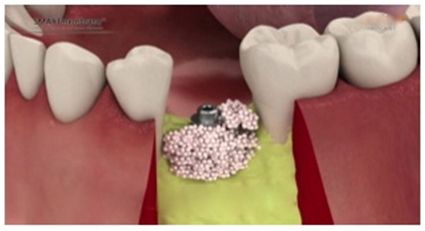
Fig 4: Decorticate around the defect site and adapt bone graft material
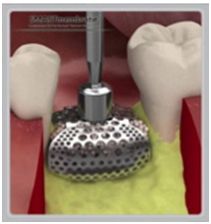
Fig 5: Place SMARTbuilder allowing at least 2mm of the mesh to extend beyond the defect and onto sound bone. Trimming of the mesh can be done if needed. Secure the SMARTbuilder to the implant with a special cap.
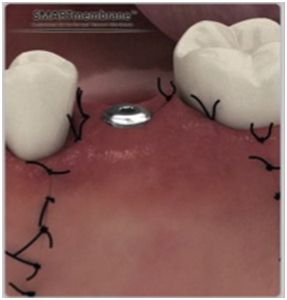
Fig 6: Suture around the cap allowing it to protrude through the tissue, eliminating a second stage surgery after implant integration. (A low profile cap is also available which can be sutured below the tissue if desired).
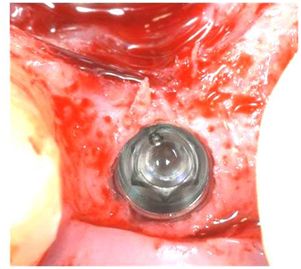
Fig 7: Pre-op photo showing facial defect
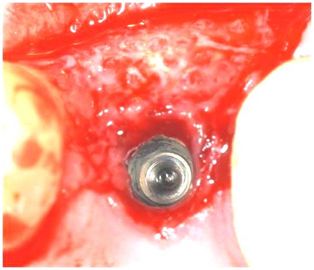
Fig 8: Post-op after 4 months, note defect completely filled with new bone