
John DiPonziano, DDS
The restoration of a fully edentulous mandible with a removable denture is arguably one of the biggest challenges in dentistry. Inadequate denture retention due to poor ridge anatomy can produce an unhappy patient and creates a frustrating situation for the practitioner. An implant-retained overdenture, however, can turn a problem into a relative pleasure for both the patient and dentist.
The author has used several types of free-standing overdenture designs in the past 28 years and has found the Locator attachment overdenture, (Zest Anchors, Escondido, CA), to have good long-term durability, and to be relatively simple to fabricate.
This article will describe the use of four Locators in a fully edentulous mandibular arch with regular-sized implants, (HiOssen, Inc., Fairless Hills, PA). This arrangement provides a very stable and retentive denture that can withstand almost all masticatory demands without dislodgment. A denture utilizing just two implants is still highly retentive but may experience a slight posterior lift when sticky foods are eaten. These differences need to be explained to the patient in the treatment planning stages of the restoration.
- Determination of Locator Size
The first step in creating a Locator overdenture is the choosing of the appropriate height attachment for each implant site. Sufficient time for healing and gingival remodeling needs to have occurred after Healing Abutment placement at second stage surgery – usually 6 weeks. Then, one-by-one, the Healing Abutments are removed and the “tissue cuff” heights recorded: this is the distance from the top of the fixture to the edge of the gingival crest. (FIG 1).
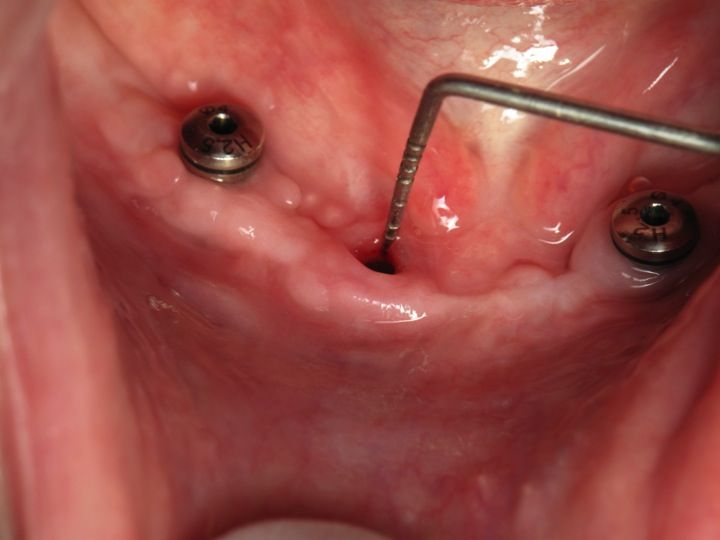 FIG 1.
(An alginate impression can also be made after all of the healing abutments are replaced, in order to fabricate custom trays for the final impressions at the next appointment).
The cuff measurement, along with the implant brand and diameter, is used to order the appropriate Locator female attachment. A cuff height measurement of 3mm, for example, provides a Locator that will be 4.5 mm tall – 3mm under the gingiva with 1.5mm protruding through the tissue for retention of the male portion of the attachment in the denture.
- Impressions and Master Model Fabrication
The Healing Abutments are removed and replaced with the appropriate Locator females using finger pressure to tighten. (FIG 2). A special re-usable Locator tool is used for this purpose and needs to be purchased separately, (FIG. 3).
Impression copings are snapped onto the female attachments in the mouth, (FIG. 4) and a medium body impression material used to make the final impression using a custom tray with sufficient clearance in the tray for the copings. After the impression is removed from the mouth, (FIG. 5), Locator Analogs are snapped into the impression copings, (FIG. 6) and the master model poured. (FIG. 7).
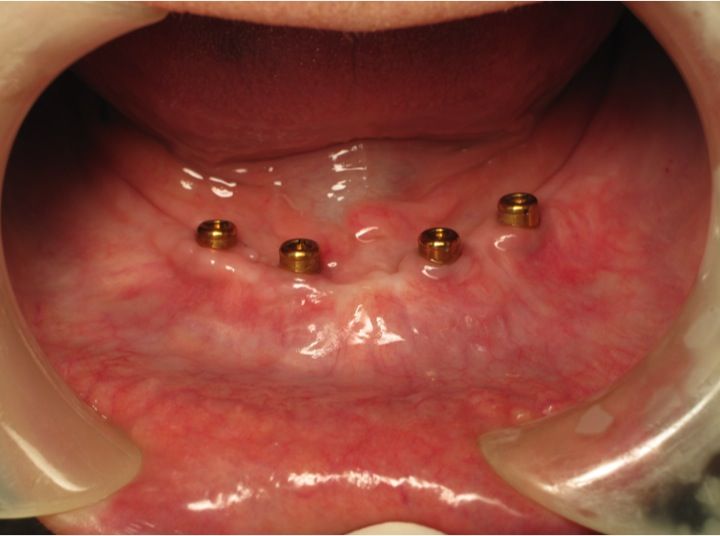 FIG 2.
 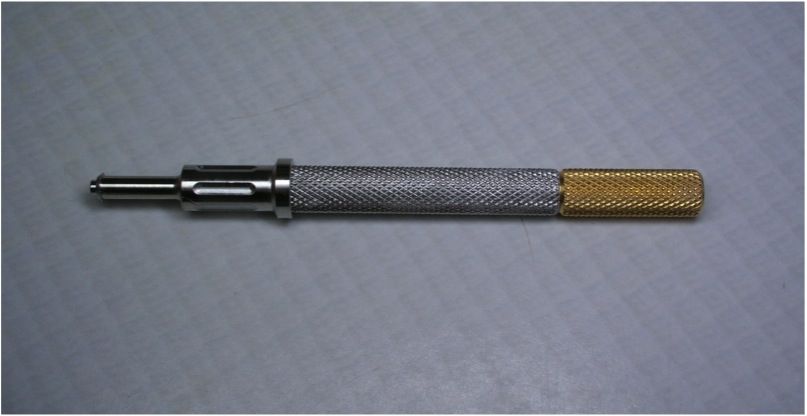 FIG 3.
 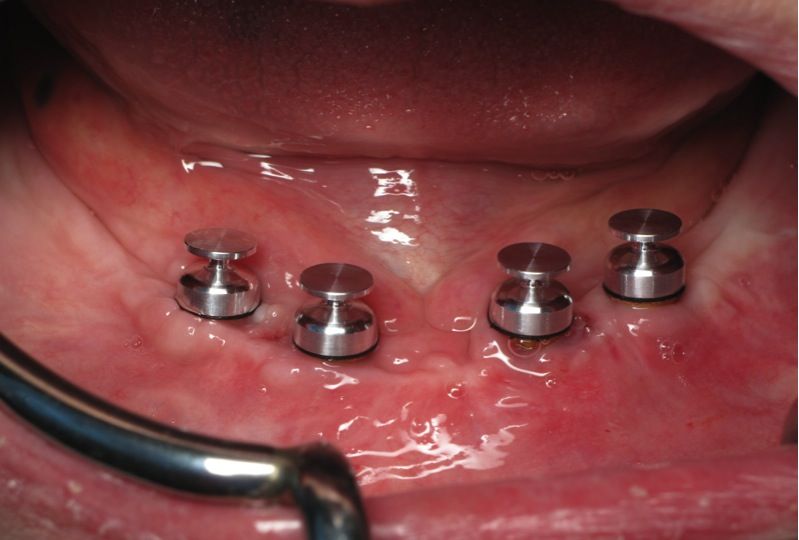 FIG 4.
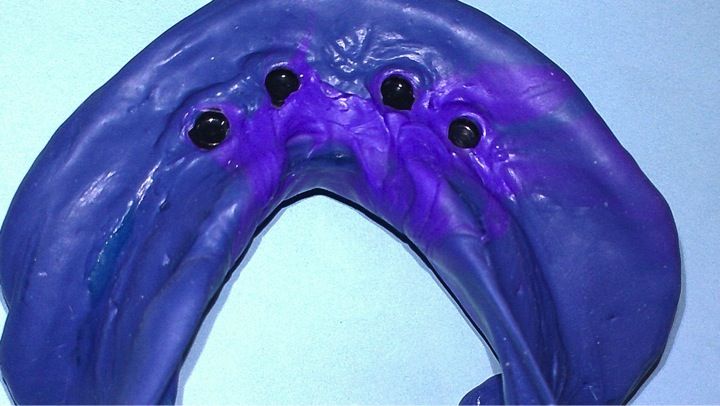 FIG 5.
 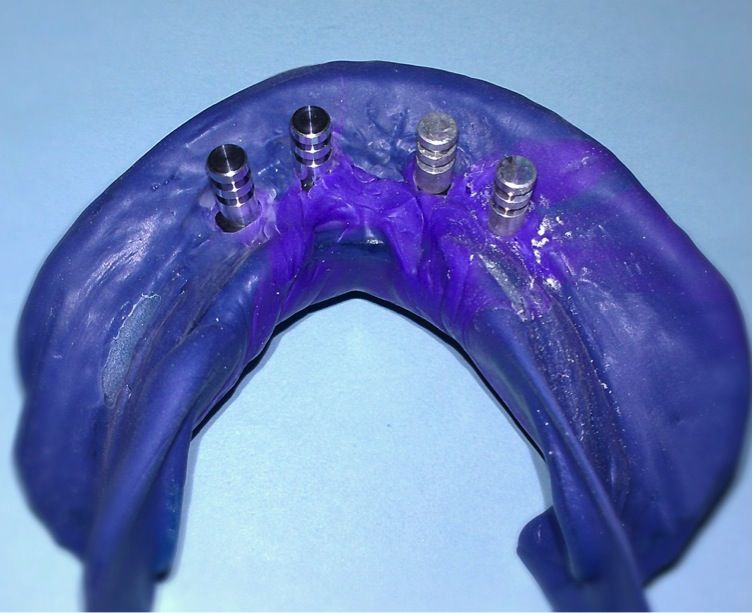 FIG 6.
  FIG 7.
- Occlusal Records and Denture Try-in
A Stabilized Occlusion Rim is used to record the proper intra-oral measurements,(FIGS. 8 & 9), and the trial dentures waxed up, (FIG 10). Once all measurements are verified by trial in the mouth, and denture esthetics approved by the patient, the dentures are fabricated.
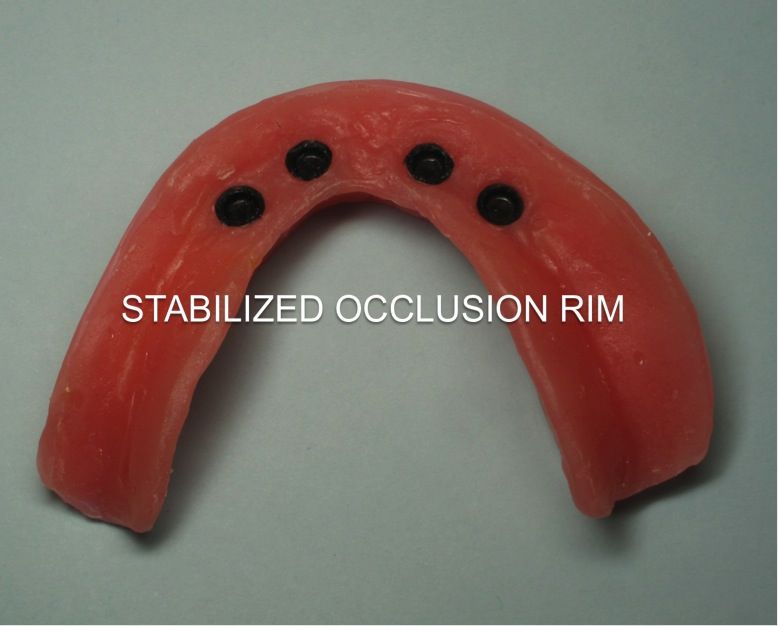 FIG 8.
 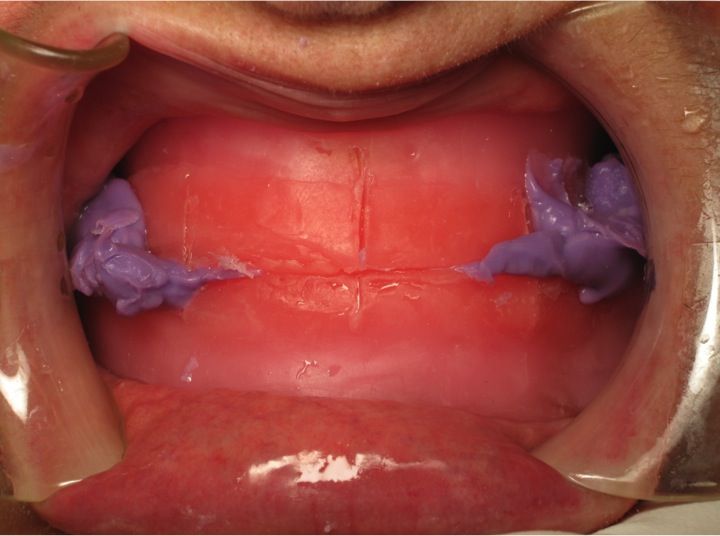 FIG 9.
  FIG 10.
- Denture Delivery
Healing Abutments are removed and the female Locator attachments are torqued to the proper specifications, (FIG. 11). The black processing males are removed from the finished denture, (FIG 12), and replaced with the final males, using the Locator tool. Trial of the various retentive males is carried out until a combination is found which has sufficient retention, as well as allowing for easy removal of the denture by the patient, (FIG. 13).
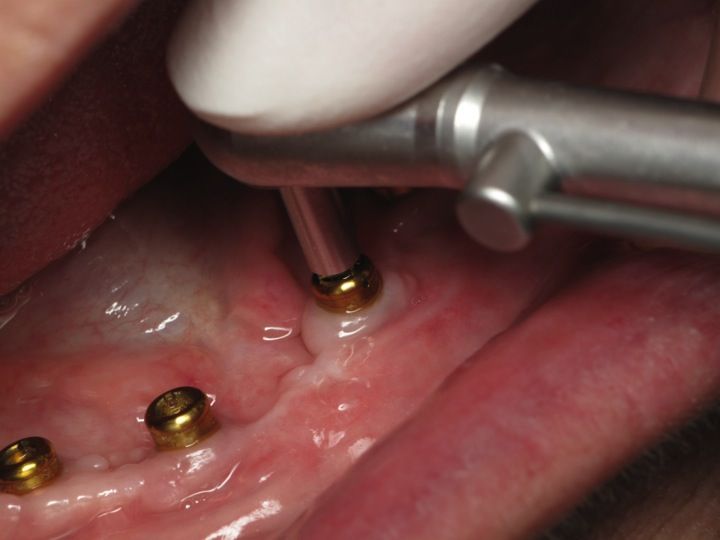 FIG 11.
  FIG 12.
 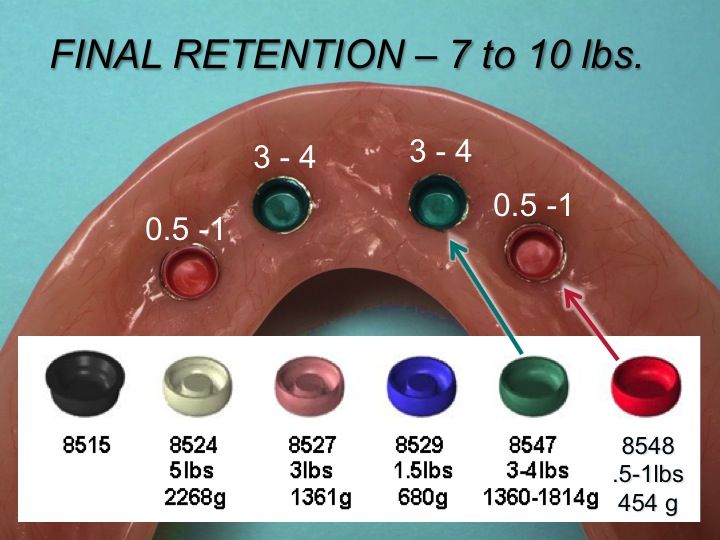 FIG 13.