
Replacing mandibular incisors with dental implants presents particular challenges to clinicians due to limited space. Traditionally, clinicians have placed one regular two-piece implants to replace two mandibular incisors. When done correctly, this modality yields clinically acceptable results, however clinicians often have to sacrifice perfectly healthy neighboring tooth in order to place one regular two-piece implant. And if the implant’s placed in the middle of the two mandibular incisors, the resulting two splinted implant crowns have to have gingiva colored porcelain papilla which may or may not look natural. Hiossen’s one piece MS implant allows replacing single mandibular incisor with single implant. One-piece implants can be placed extremely close to natural teeth without the risk of bone loss and subsequent papilla loss. This is possible because one-piece implants lack micro gap. Placing a narrow diameter one-piece MS implant requires expert skills and thorough knowledge of the implant system. For this MS system, I recommend a 2.5 mm diameter with a 13 mm length. This implants comes with either 2.5 mm or 4 mm gingival cuff height. I recommend a 2.5 mm gingival cuff height for normal healed sites and sockets without bone loss. 4 mm cuff height implants should be used in cases where there are deep pockets or healed sites with narrow crestal bone width in labiolingual direction.
Case
This elderly male patient in his late 70’s went to two different dentists prior to coming to me for an implant consultation. (figure 1) One dentist recommended extracting tooth #25 and placing one implant and make two implant crowns to replace teeth #24 and #25. The second dentist recommended extracting all remaining mandibular incisors, socket graft, wait 4 months and place two implants at teeth positions #23 and #26, wait 4 months and restore the implants as 4 unit FPD.
Figure 1

3 mm mesiodistal space is available at #24 position
I recommended placing one implant without removing any other remaining incisors. (figure 2 – 4)
Figure 2
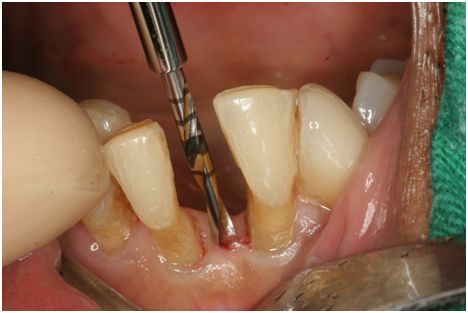
In order to minimize chance for bone loss, flapless technique is used.
For dense bone, 1.8 mm diameter twist drill is used as a final drill.
Figure 3
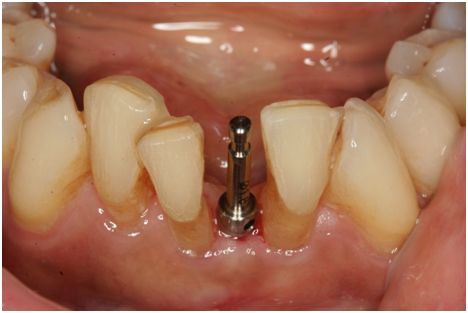
Guide pin is inserted
Figure 4
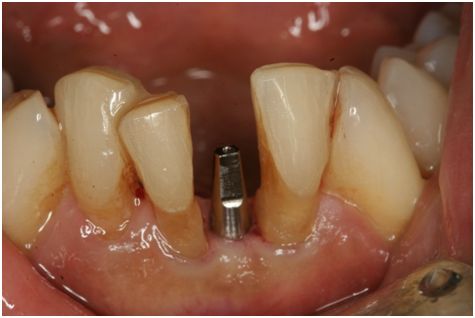
The manufacturer recommends achieving minimum of 30 NCm as final insertion torque. The implant should be placed so that it is coming out of incisal edge. Immediately after implant placement, provisional crown is fabricated directly inside patient’s mouth and finished on a lab analog. (Figure 5 – 8)
Figure 5

Figure 6

Figure 7

Figure 8
Minimum amount of temporary cement should be used to retain the provisional crown in order to avoid excess cement extruding beyond crown margin. (Figure 9)
Figure 9

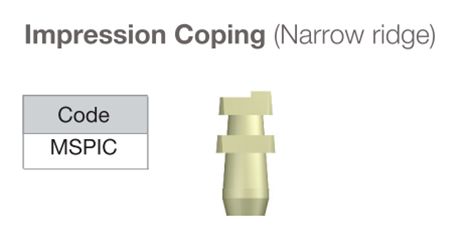
Hiossen’s MS system comes with plastic impression copings. Impression is easy using this impression cap. You just need to snap on the impression coping and pick it up in the impression material of your choice. (Figure 10)
Figure 10
I have tried PFM, layered Lithium Desiiicate and Porcelain Fused Zirconia (PFZ) for this implant system, and all three showed acceptable esthetic results. However, for majority of lab technicians, Lithium Desilicate and PFZ will yield the best results. For this particular case, PFM was used. (Figure 11- 12)
Figure 11
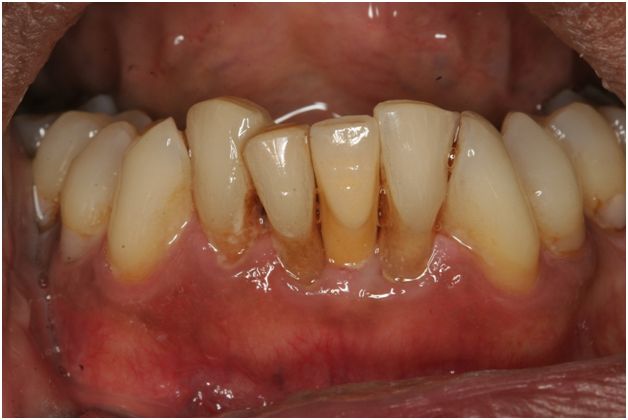
Figure 12
This case was follow up for 6 years with no change in soft and hard tissue level. (Figure 13)
Figure 13
