
John DiPonziano, DDS, MAGD, DICOI
The extraction of a tooth, with the immediate placement of an implant fixture, is an accepted technique in dentistry. One of the challenges of this procedure is performing the extraction of a severely broken down tooth with minimal destruction of the surrounding soft tissue and bone.
Photo 1. 
Removing too much osseous tissue can cause insufficient bone to be present for an accurate osteotomy. This can lead to an unstable fixture which may not integrate in its intended position, or possibly not integrate at all.
In addition, even if osseointegration of the fixture occurs uneventfully, the surgically induced soft tissue damage can compromise the esthetic outcome of the final restoration.
The traditional technique for atraumatic tooth extraction involves the use of thin bladed periotomes or ultrasonic piezotomes. These instruments are used to sever the PDL and allow removal of the tooth with minimal bone damage. Although they can be successful in eventually removing the tooth, they are extremely time consuming techniques which can induce more anxiety in the conscious patient, and frustration for the dentist.
Using a high speed surgical handpiece with a carbide bur is another method to surgically remove a structurally compromised tooth. But unless the handpiece has the capability to be attached to sterile water or saline, the coolant water is delivered through the dental unit which is not sterile.
There is a high-speed handpiece available that attaches to the industry standard implant E-type motor, (NSK TiMax Ti95EX, available through dental dealers, photo 2). The handpiece has a port to accept the same irrigation tubing that is used with the implant handpiece.
Photo 2. 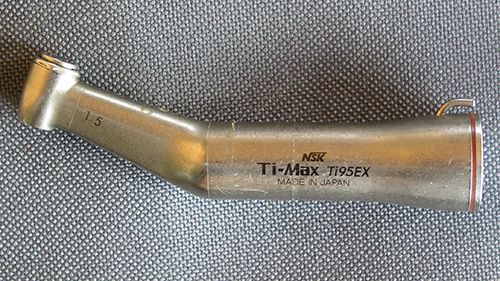
This handpiece accepts friction grip burs and has a final drive speed that multiplies the speed of the motor fivefold. Because it uses the electric implant motor, it has high torque and can cut through tooth structure with ease. (This is in contrast to the standard implant handpiece which has a final drive that is a decrease of the motor speed and used a relatively slow latch-type bur.)
A high-speed tapered fissure bur can be used to make space for elevators by cutting down the mesial and distal aspects of the tooth without destroying the bone needed for implant stability. Also, preserving the interproximal bone is necessary for the regeneration of an esthetic papilla for the final restoration. This handpiece also makes quick work of sectioning multi-rooted teeth for removal with minimal bone damage, and can be used for decortication prior to bone grafting.
Technique for single rooted teeth:
Use 15c scalpel blade to sever coronal attachment completely around the tooth and about 2mm deep, (photo 3).
Photo 3.
Make initial cuts, with the tapered fissure bur, down the mesial and distal aspect of tooth between the tooth and PDL to a depth of about 4-5 mm, (photo 4). Take a radiograph to ensure proper bur trajectory, (photo 5). Continue both depth cuts to a length of approximately 8mm. These cuts should be the full mesial and distal width of the tooth from facial to lingual line angles, but not touching the fragile facial plate of bone.
Photo 4. 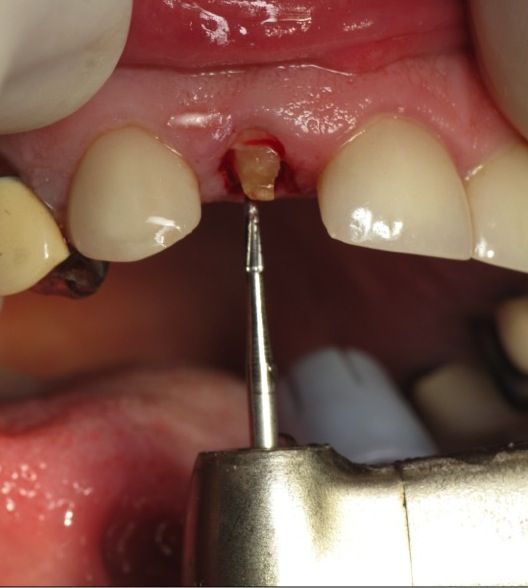
Photo 5. 
Place a small straight elevator into the newly formed spaces and slowly move tooth in alternate mesial and distal directions, (photo 6). It is important to begin the elevation in a slow, steady manner, so as not to fracture the coronal portion of the root. Once the tooth starts to loosen, proceed to a larger elevator to get a minor amount of coronal movement. This may take several alternating mesial and distal passes before any coronal movement is seen.
Photo 6. 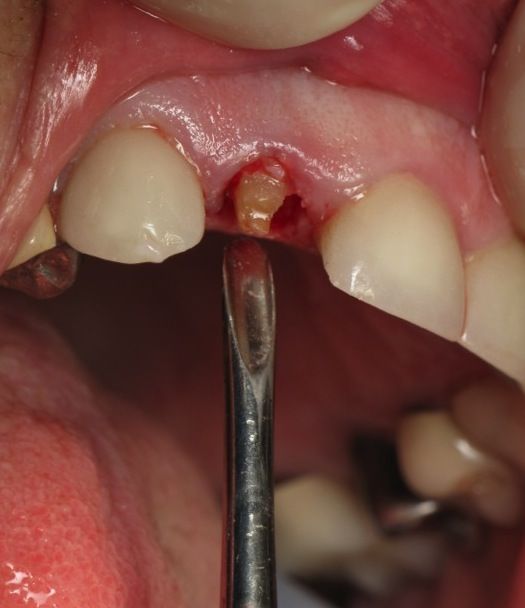
After tooth has sufficient movement it may be removed with small beaked forceps or root tip elevator, (photo 7). Place implant, bone graft, and membrane if desired, then close with figure eight suture, (photo 8).
Photo 7. 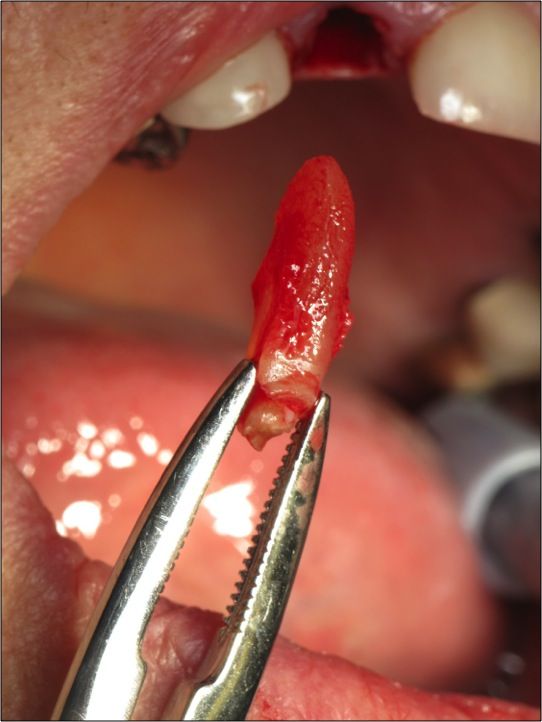
Photo 8. 